So you want to day hike/run the Grand Canyon….

*the national park does not recommend day hiking to the river and back and highly suggests camping at the bottom for one night instead. But, if you’ve got a crazy hair like me and enjoy challenging yourself or have been considering this for awhile….continue reading!

ABAE93F4-5C42-4F22-B825-BA45E28A6A1E

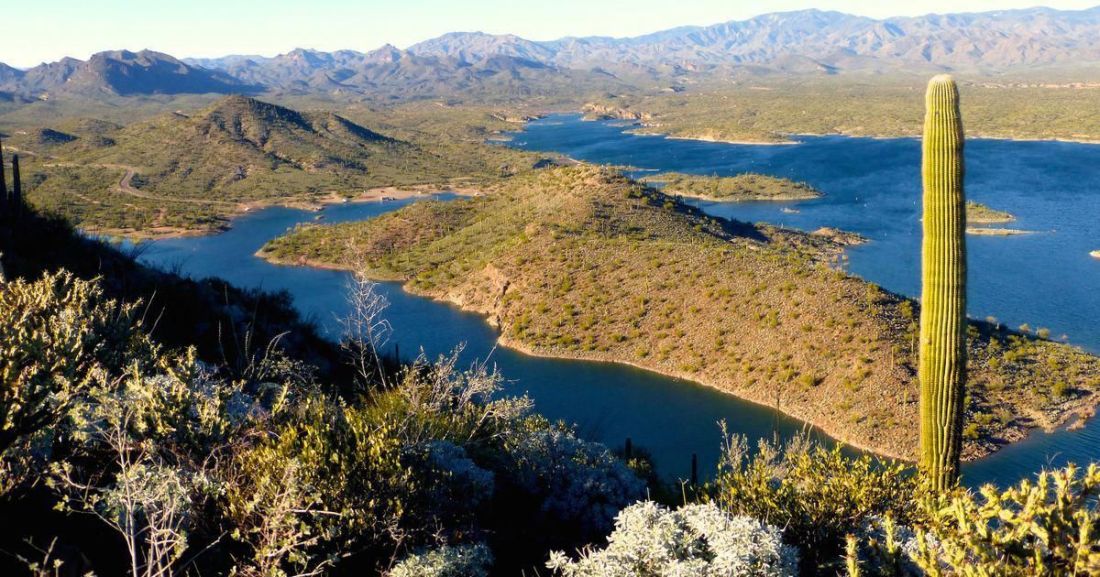
The Grand Canyon is one of my favorite places I have ever been. It took me three years of living here in Arizona to get there for the first time, just hiking along the rim at the North Rim. I saw down into its vastness and internally, I felt an urge begin to rise. I wanted to experience the canyon, not from up overhead like this, but from way way down in its depths. After that, there was no stopping me from my first experience hiking down into the canyon and out in a day.

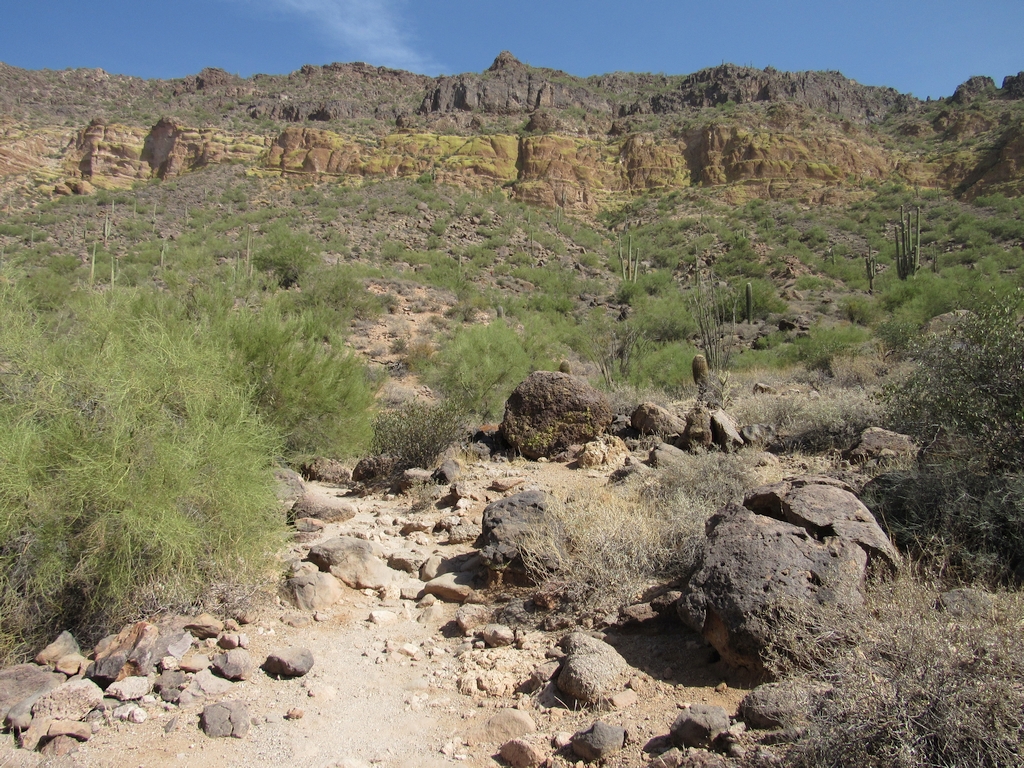
What does it take to be able to go down into the canyon? Not nearly as much as it takes to get back out of the canyon. One of the biggest things to realize first and foremost is that the canyon is at an elevation gain, even the bottom of the Grand Canyon along the Colorado River is at 2400ft. in elevation, while the South Rim sits at 7000 feet and the North Rim at 8000 feet! When you tackle the canyon, you should try to allow yourself time to acclimate to the elevation gain if you can. Even staying at a higher altitude the night before is helpful. Also be prepared for the air in the canyon: humidity usually ranges from 10 to 30%.

E1BD4066-5FBB-421A-BCA9-70AC0A3D4B60

So how do you prepare? Try to hike at higher elevations if at all possible before you go into the canyon. Walk on an incline on a treadmill or stairmaster if you aren’t able to get outside and do hikes with elevation gains and add weights if possible (weight your pack while hiking or carry dumbbells on the treadmill/stairmaster). These practices will help your body strengthen along with adjusting to carrying weight while going uphill. Strength train to prepare as well: training legs will make your base that much stronger while training back and arms will make carrying a pack (if you’re hiking) more doable. Also consider time to prepare: some people will want to train for a few weeks, others a few months, it will truly depend on your starting point of fitness.

Things to consider:

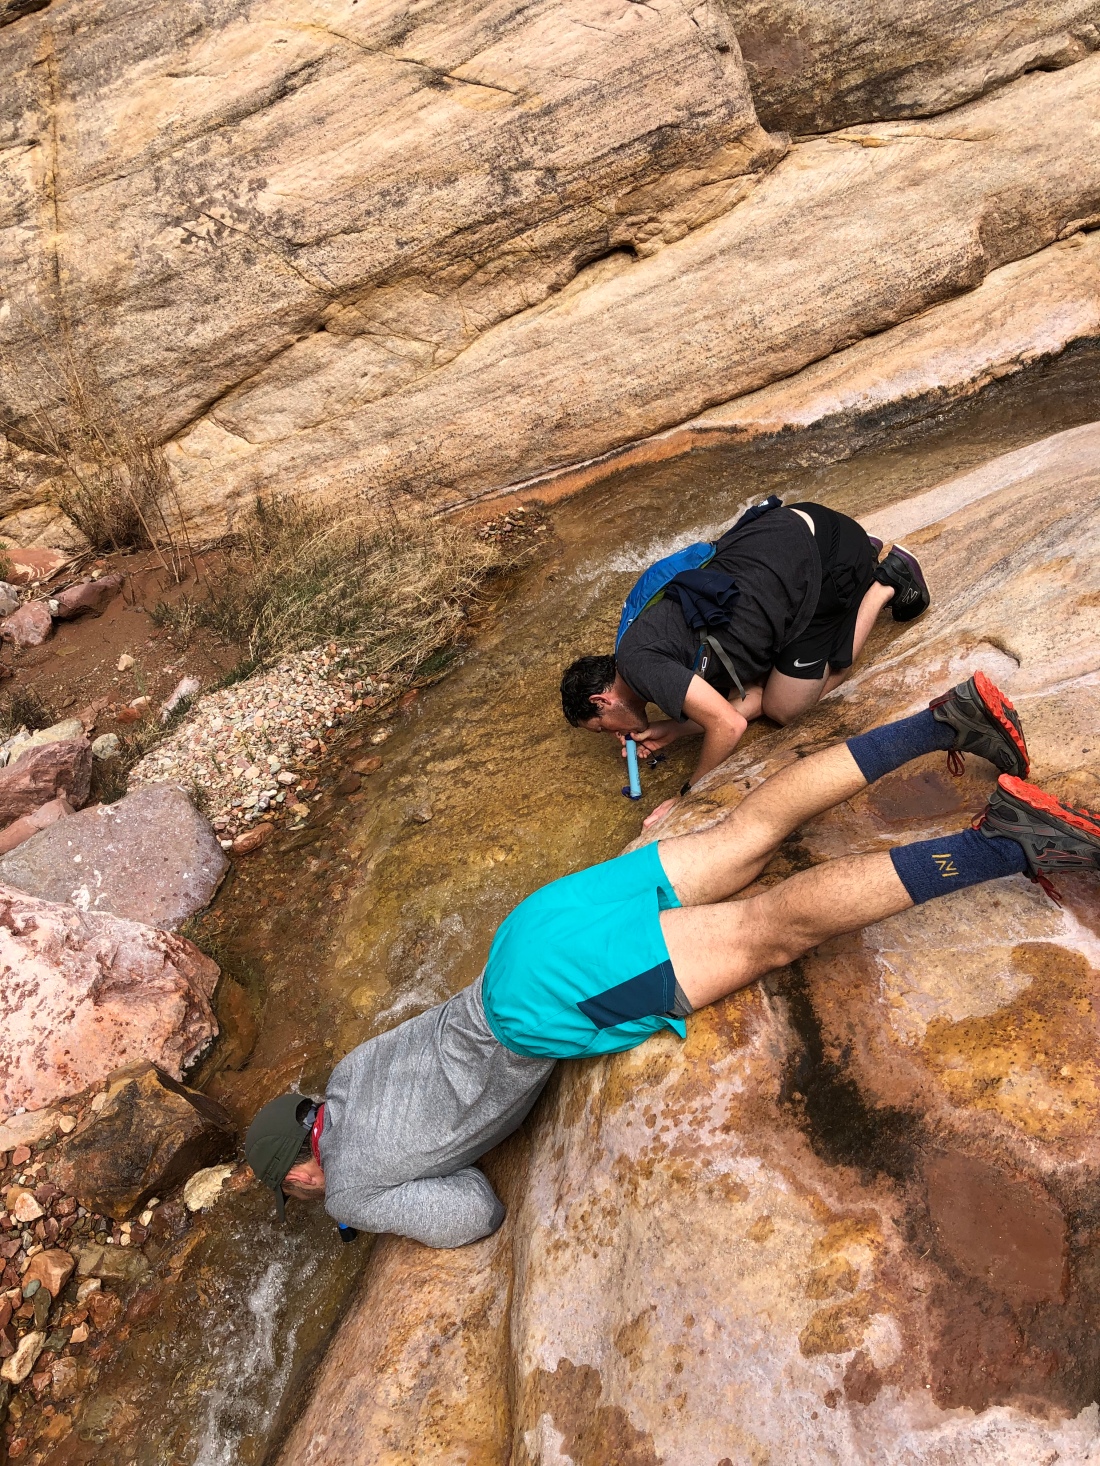
Water — some trails have water access, some don’t. Researching ahead of time is really important and being able to prepare properly is key. Lifestraws are a high recommendation for the trails.

20981578-2011-4E9B-95FB-275016709AF0

Temp — the rim will be cooler than what you’ll meet when you get down to the river. Look up weather at the rim and also at Phantom Ranch to get a good gauge of how it will be — then you can properly pack layers, a hat, sunscreen, a buff, a windbreaker, etc. Heat will make the canyon much harder to handle since many portions of the trails are exposed (especially on the South Rim as the North Rim does get cooler).

Shoes — make sure you are wearing shoes that are broken in and comfortable that you know don’t blister you, give you hotspots or irritate in any way. This will make your experience that much better as losing toenails and climbing out with blisters is not fun (trust me!)

Snacks — you need proper hydration and energy when you are tackling this gorgeous place. Your body works hard and you need to be able to sustain your energy to properly get yourself down and out in one piece! Salty snacks and electrolytes are major go-tos for me.

Your Clothes — it is not a bad idea to wear clothes that you know will not chafe you, rub you in the wrong ways or are not made for the conditions you are going in — try to match your gear up as well as you can to the type of weather you will be facing. Go on hikes or runs in the gear you want to wear so you know you won’t have issues as you go!

Your abilities — be open and honest with yourself about how much you can take on. How are your knees? Ankles? How is your cardio? How is your heart rate? How strong are you mentally and physically? I recommend trekking poles if you do need the extra assistance taking pressure off your knees and any braces you may need for runners knee or IT band, ankle support, etc. The main rule of the canyon is, if you go below the rim you have to be able to get yourself out. Don’t under-prepare or overshoot your own abilities — take on as much as you know you are able to take on and continue to build over time! The canyon has been there for millions of years, it won’t be going anywhere any time soon!

Breaks — allow yourself time to stop and catch your breath when needed. The canyon is steep and rigorous and your heart rate will rise, especially with the thinner air at elevation. Be mindful, not prideful — allowing yourself a few minutes to reset yourself can help you to feel brand new.

Injury — bring a tiny first aid kit at the least. You never know if you’ll take a tumble and having alcohol swabs, bandaids, athletic tape, etc will be a blessing in disguise.

5682DDC4-D3BA-4840-892C-9DCD561DA576

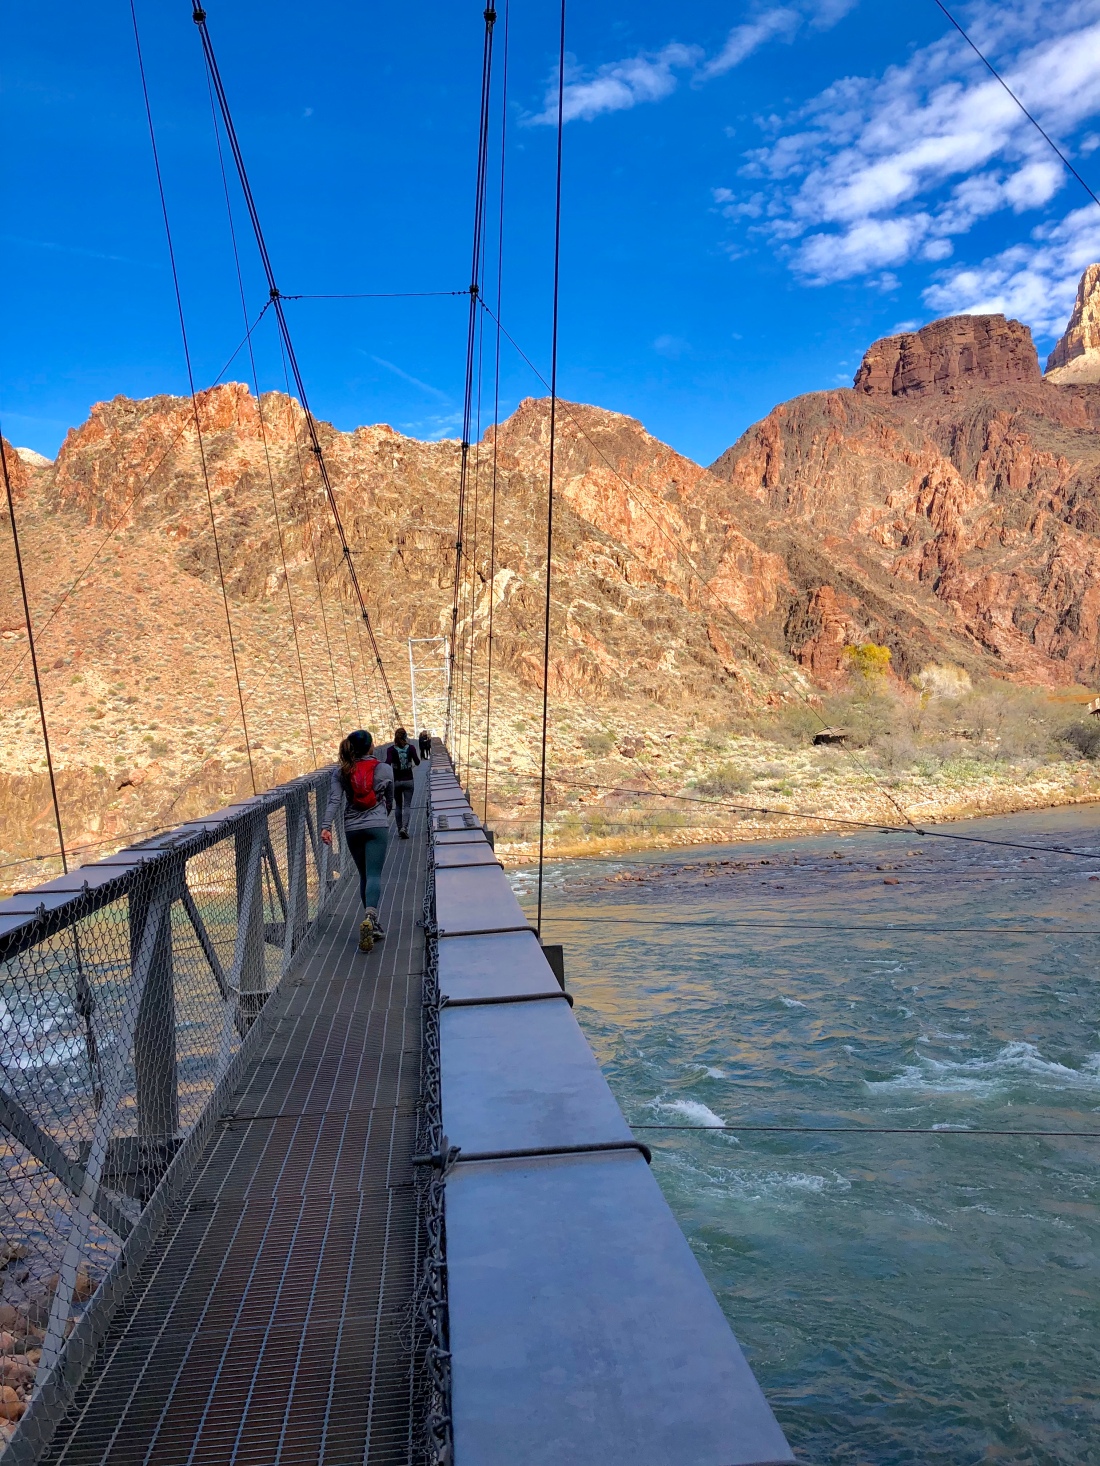
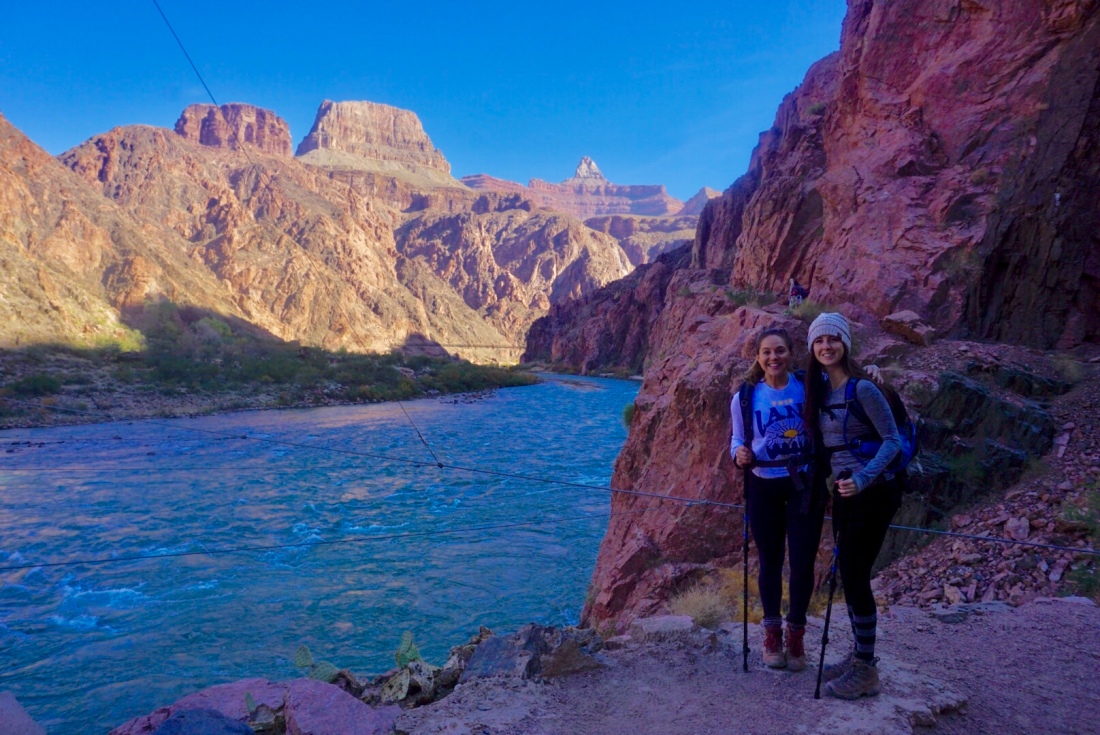
My first hike down into the canyon was a day hike from South Kaibab to Bright Angel. Taylor and I were in decent shape, hiked often and thought — why not! Nothing can prepare you for how mentally challenging the Grand Canyon is. The hike down (about 7 miles) was beautiful. The first view of the river had us both elated and in awe. We were ecstatic crossing the bridges, seeing the river up close and just being down there — we’d MADE it. Well, not quite. Starting the ascent back up to the Bright Angel trailhead was very challenging. With every rest break, lactic acid would make our legs heavy and even more sore. We leaned on our trekking poles for dear life, willing them to pull us up the 2.5 miles of switchbacks to the top. It was 18 grueling miles and we waddled around to the busses in the most pain. Joyous pain. Our feet pulsed, swollen, numb. All of our energy was completely sucked dry from our bones. But we looked at each other and smiled, completely drunk on the fact that we had DONE it.

CBC965FF-89D3-4EA4-9F0D-5609D32499E8.jpeg

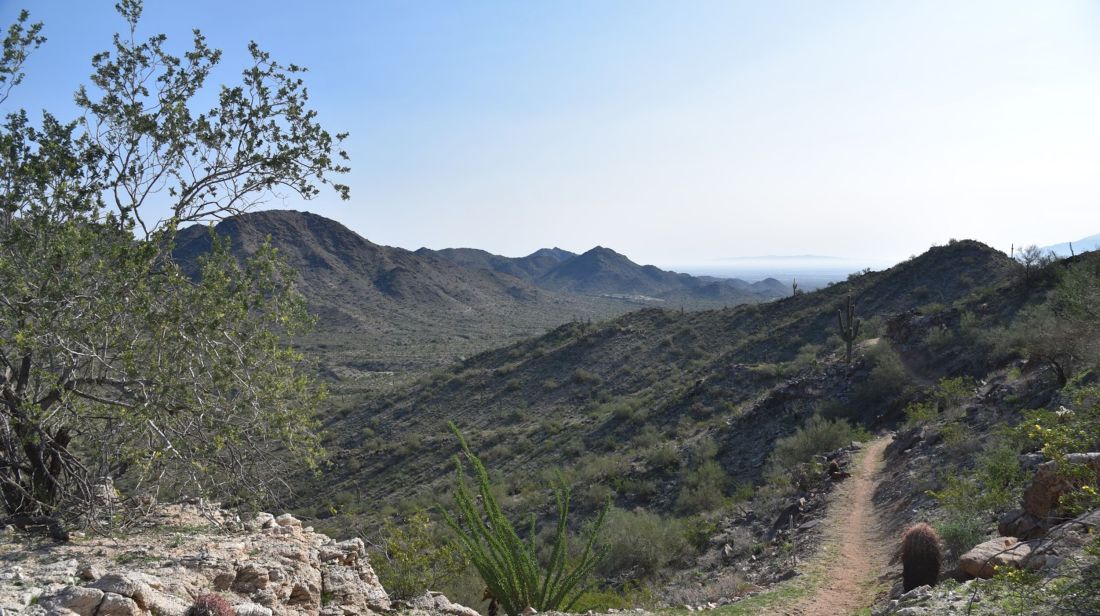
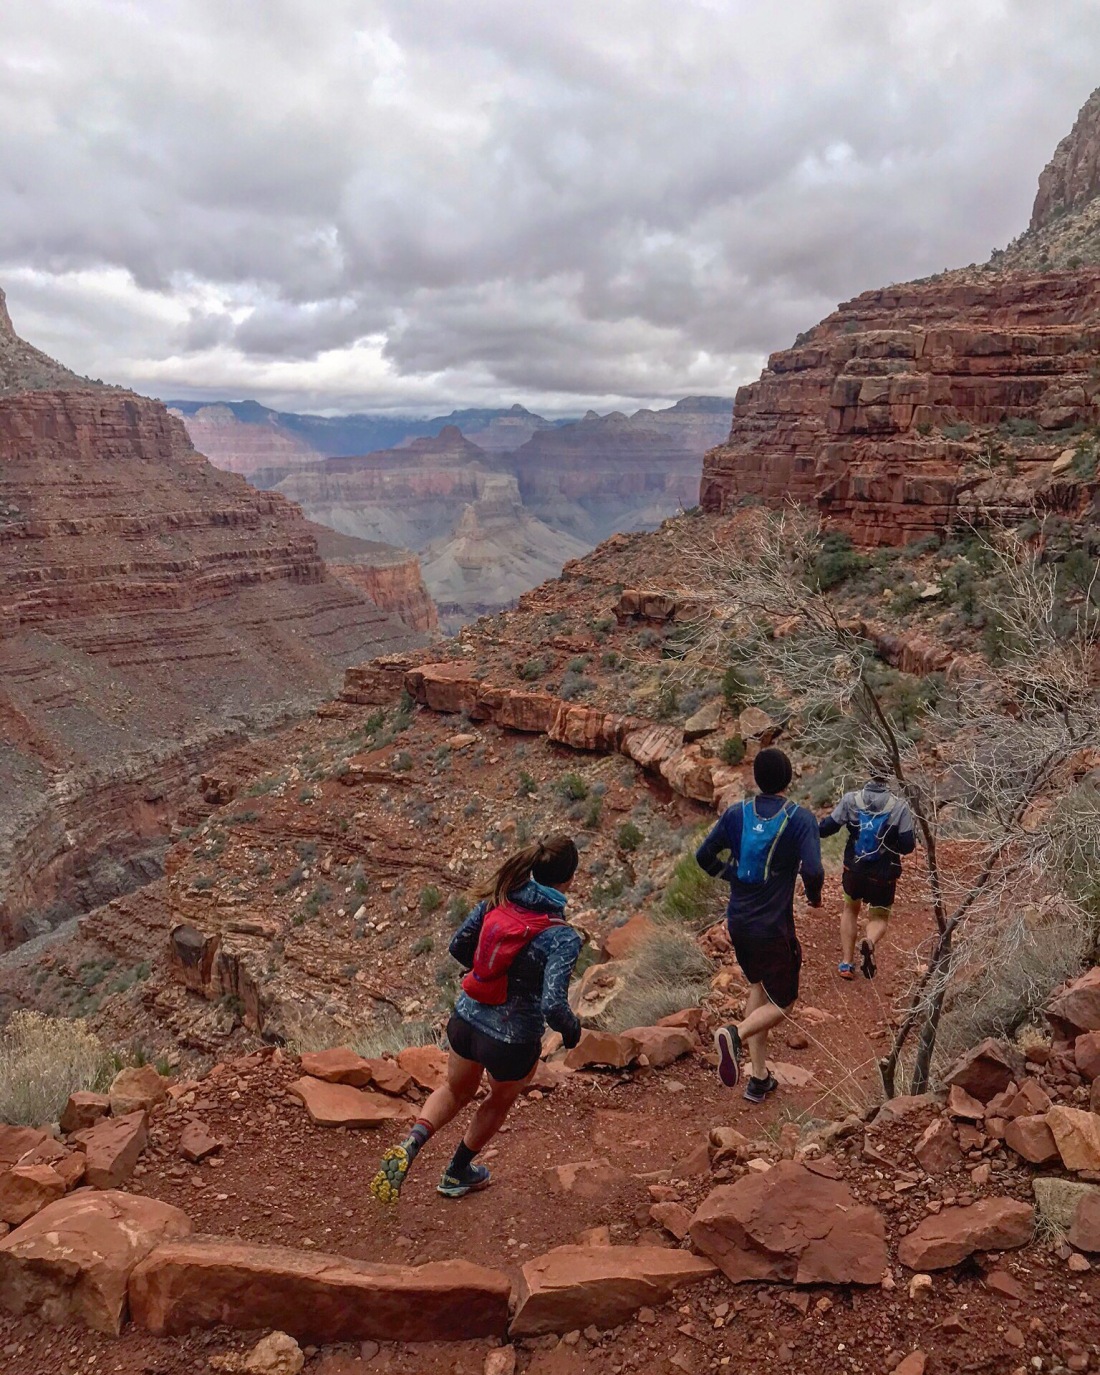
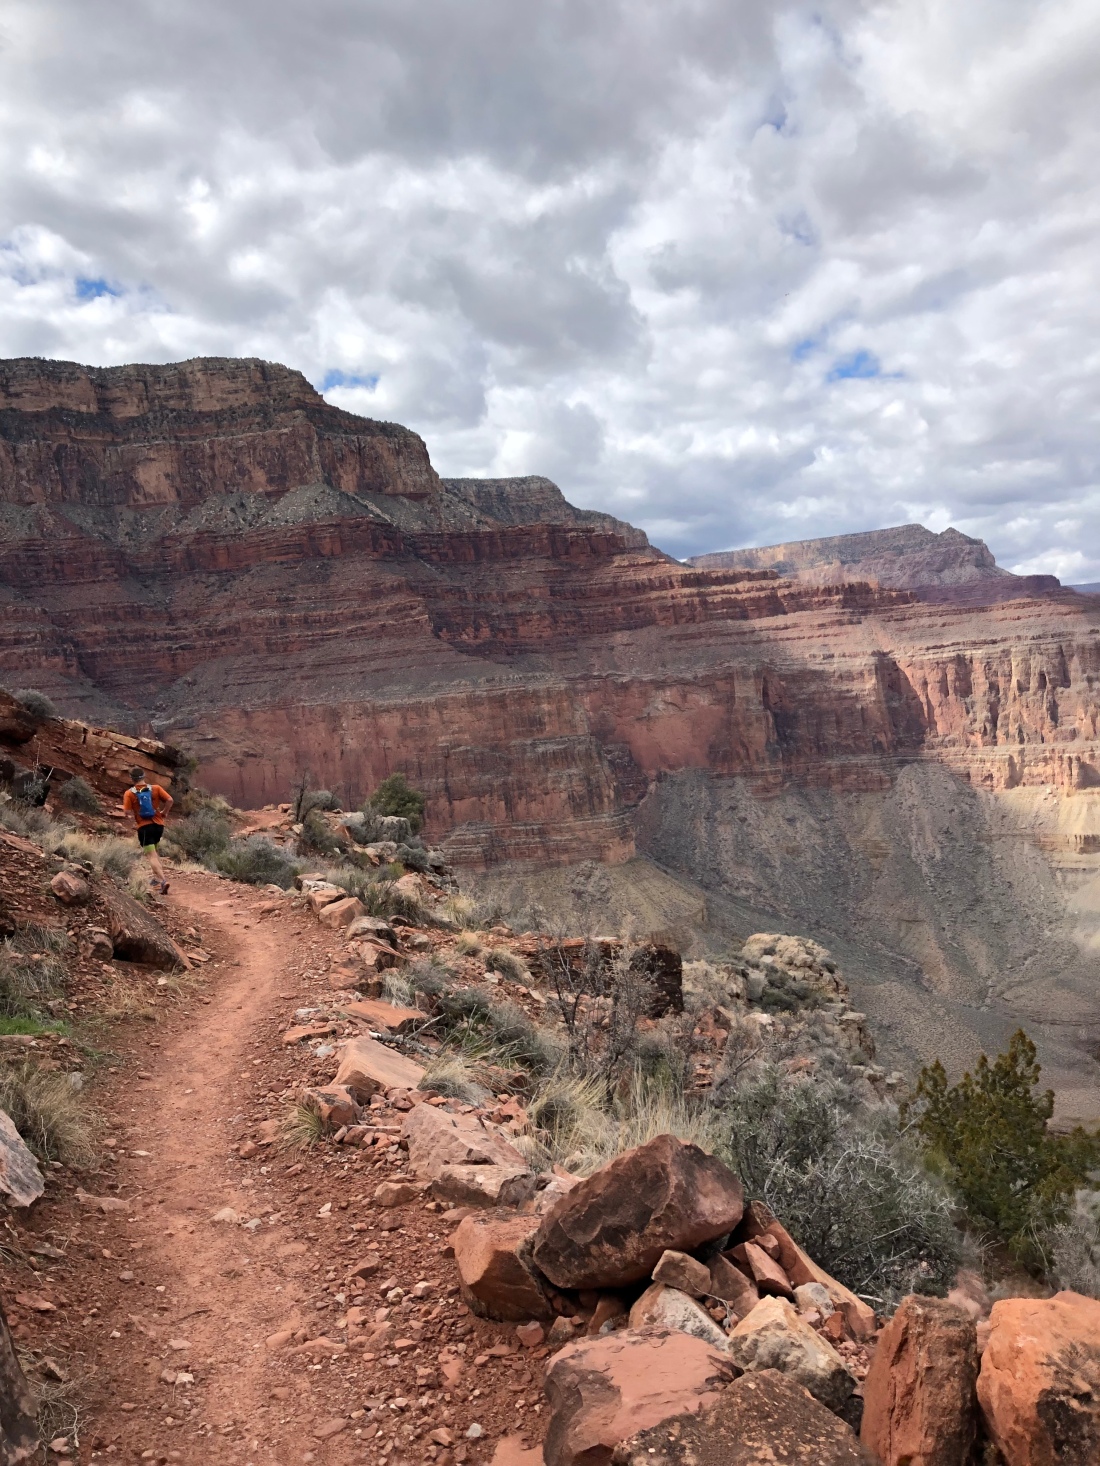
After that, I took up trail running and the canyon became an entirely new playground. Nothing is as exhilarating as running down into the canyon. Some things to keep in mind with running into the canyon are: water sources, energy sources, staying injury free and being very aware of trail conditions and surroundings (we ran into rock slides yesterday), how technical the trail is — some are more primitive than others! Know if you will be around many other people or not (is this really well traveled– like Bright Angel, or less traveled?), always bring a headlamp because you never know how things will go.

E4B8E337-0D91-441B-ABE8-3BB00F36D850.jpeg

Running the canyon is a very different experience: your pack is smaller, you have to operate more efficiently, you have to be able to handle the mileage and elevation declines and gains in one push, you mentally have to be stronger than the pain your body will face — because it will get uncomfortable, promise. There are many points I would suggest testing out if you want to get a taste (Skeleton Point, Indian Gardens) these points don’t take you all the way down to the river and give you a sampler on how steep the canyon is and if your body is ready/prepared to take a day trip on!

The canyon has many trails to choose from and there will be technical bits to all of them — ranging from easier to very challenging and your trail running shoes should reflect the amount of technicality you are going to face. Set yourself up to feel good, not roll ankles or have pain in your arches, etc.

Make sure you are dressed to not overheat or run too cold or you may be in for a miserable time in the canyon as well. Once you start running, your body will heat up to about 10 degrees warmer than what it is like outside, so preparing for this is key. I always start wearing a pair of gloves and a headband or beanie and can easily shed these as my body warms up — I am sensitive to the cold and this is an easy way for me to regulate my temp in seconds.


What has helped you prepare for challenging hikes/runs with a lot of elevation gain?


Getting Mentally Tough With Every Mile


51237838_10156427312049775_1887072363434999808_n

I get asked “why” I run all the time. The first thing that comes to mind for me is because I love being outside and now, I get to see way more in a shorter amount of time! But even deeper than that is that trail running has made me so, so, so much tougher. Mentally, I am able to accept things, logically face things and come up with solutions when previously, I would crumble, hold things internally and let them effect me very deeply. Mental toughness is a quality that can be molded, like a beautiful piece of pottery, over time. What does it take to start working on your mental toughness? Discomfort.

“Pain, it only hurts”

-ultra-running legend Scott Jurek

Like distanceathletics states, “the majority of DNF’s don’t come from an unbearable source of pain. And the don’t come from injury. They come from the runner, slowly, and skillfully, talking themselves out of the race. The just don’t want to be there anymore, and they tell themselves whatever is necessary to end the experience with honor. Or just to end it.”

The hard, uncomfortable situations are what truly shape us and force us to grow. Those moments when chafing begins to sting, sweat gets into the burns and you want to immediately throw in the towel. The times when your calves, hip flexors, knees and ankles are screaming at you to end the movement, to stop the climbs, to quit bombing down the steep hills. When you’re hiking and it starts to rain and you’re cold, tired and discouraged. When you fall and cut your shins or palms or forearms open and everything hurts. Those hikes where the climbs just keep coming and it will never end. When hot tears hit your face because lets face it… pushing ourselves isn’t easy and it brings up every emotion possible. Things get raw. Distractions aren’t readily available. Going into the “pain cave” is….inevitable.

Distanceathletes again say it perfectly, “Those moments where everything is moving fast and your heart is slamming into your chest and you’re asking yourself whether you can hang on-that is living. In this moment you are in your element. You are a strong and powerful human being, testing and exploring the outer ranges of your physical and mental capabilities. Where else would you rather be?”

When you are facing obstacles, getting gritty and feeling pain…that is living. Grinding through these experiences makes us into a stronger, more courageous, more capable person. Mental toughness translates to most every aspect of your life: your ability to handle hard news, tough situations, impossible seeming setbacks, stress, doubt…the list goes on. Mental toughness gives us the tools to wrap our minds around obstacles to see the other end, that we can endure hard things and come out still fighting.

When I think of practicing mental toughness — yes, practicing — I am in the midst of learning how to be out running for hours at a time. If you are beginning your trail running adventures, you can start by saying, “I’m going to be out here for 45 minutes” then, “I’m going to be out here for an hour”…then two, three, four hours. This practice of just having radical acceptance really shifts things. “I am going to be out here for most of my day, this is what I’m doing, this is what is happening”. This means it may be painfully slow, it may feel nearly impossible, but….mentally I am preparing myself that this is what is in front of me.

52825978_10156471627179775_430669423175532544_n

If the miles feel intimidating what do you do? Break the mileage down into attainable bits. Mile by mile, 5 mile chunks, aid station to aid station, one cactus to the next. Whatever helps you just keep moving forward will continue to help you get stronger. Running truly is a sport of mental strength. Our bodies will keep going as long as our brains tell it to. How amazing is that? It also goes to show how much we influence our own capabilities and perceptions of what we can achieve.

One thing I’ve always loved about my time with Lululemon was that they always always had you write down your dreams and goals and then identify your WHY. The same goes for any sport you take on: why are you doing this? Why are you training? Why are you signing up fo the race? Is it to work towards a milestone of health, is it for the accolades, is it to become elite at the sport, is it because you are passionate about the activity, is it to raise awareness for a cause, is it is for the sole purpose of testing your limits? Maybe a mix of all of them, but truly know your “why”, dig deep and when things get dark….remind yourself of it. Over and over and over again.

I think it can be so easy to lose sight of what got us into something for US, that we focus on everything and everyone else and what they are doing around us. It takes away from our ability to feel joy and pride for what WE are accomplishing. It is really important to be able to say “I am so grateful and happy that I am able to be here, experiencing this, with a healthy body.” Mental toughness also means expressing appreciation for our bodies, those that support and encourage us and for nature in general — because if you’re out there, you’re seeing some of the most beautiful areas in the world, end of story.

I know it may sound sugarcoated but trying to keep your mind in a positive place and expressing gratitude along your way will make your experience that much brighter every single time. When you allow your mind to get down, negative and heavy it will stay there and therefore, your experience will become tougher than it already is. I’ve had runs where I focused so much on something (my body in pain, the heat, the elevation gain, my pace) that I didn’t like that it completely clouded the main reason I’m out there: to enjoy the trails, to be in nature and to disconnect and get in tune with ME.

The more we can train our minds, the better we become. The more real we can get with ourselves and the further we can push ourselves. Mental toughness doesn’t happen over night, but it is something that totally changes the game performance-wise and in life!


*all gear worn in images is from RunJanji

* fuel sources are always Salt Stick + Spring Energy

Experiencing A Flash Flood

If you’re anything like me, the term “flash flood” means rapid amounts of water in a very small amount of time occurring right around you, right? Not always. This past weekend I experienced my first flash flood and a flood that didn’t come from immediate rain happening right around me.

E35DB7DC-2852-45E8-8247-0E1E4EFB58B0

National Geographic explains it by saying, “Most floods take hours or even days to develop, giving residents ample time to prepare or evacuate. Others generate quickly and with little warning. These flash floods can be extremely dangerous, instantly turning a babbling brook into a thundering wall of water and sweeping everything in its path downstream.”

Our group decided to go explore Southern Utah this weekend, as the rest of the state of Arizona was getting rain all weekend. After some scouring, the Page area had a little sun emoji for Sunday and we wanted to get in some miles…Page was our saving grace, or so we thought at the time. We camped at Lake Powell, being woken up in the middle of the night to wind so strong it shook the truck-bed we camped in. I sat up, hoping my friends in their tents were still outside as the wind howled around the shell I was safely under. When the sun began to rise, big black looming clouds still hung over the air like sludge.

Slowly, the clouds began to break and shades of orange and pink tinted the sky….soon everything was calm and shining and beautiful. We all smiled, relieved, today was going to be a good day. We hung around the beach, making breakfast and playing with the pups before heading to the trailhead we were going to start from. With one 4×4, a small car and a two-wheel drive truck, we navigated the dirt road that wound down and over a dry wash to the trail. Parking, we all began getting our packs ready and complaining about the strong wind that was still present making us shiver before the adventure.

63BC1A05-F307-47F7-89B9-C74DD76F4133
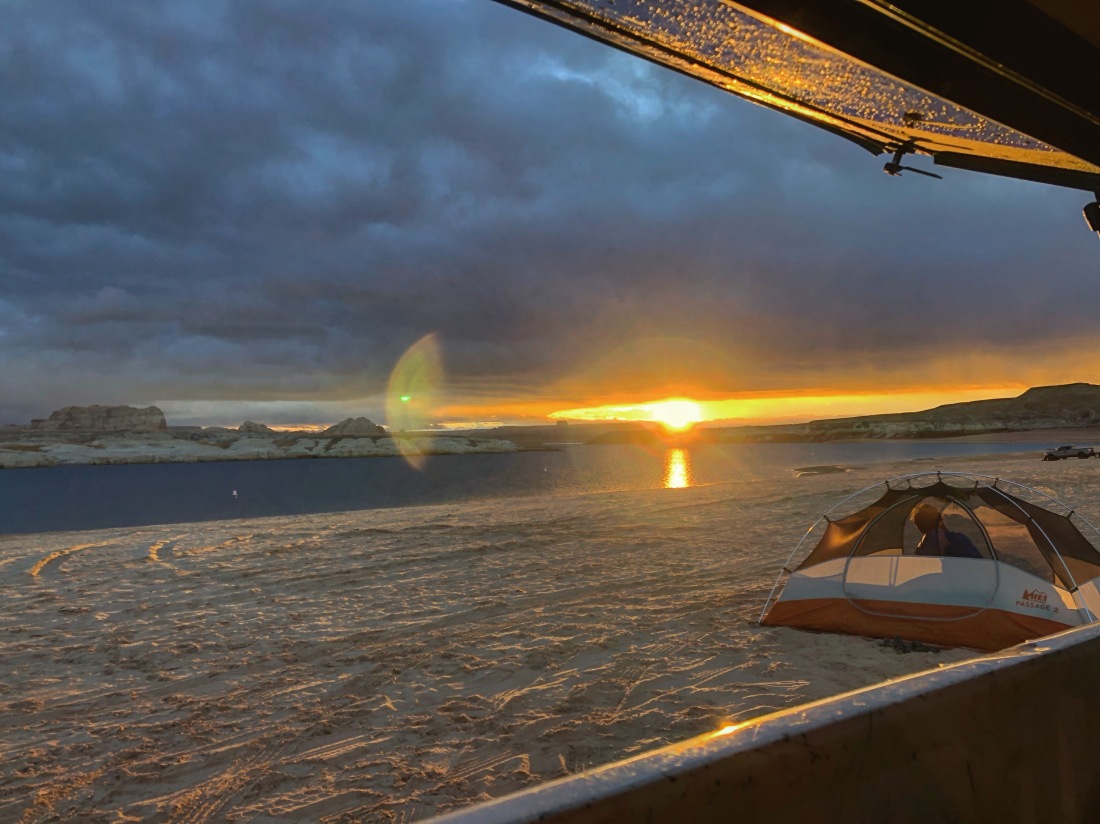
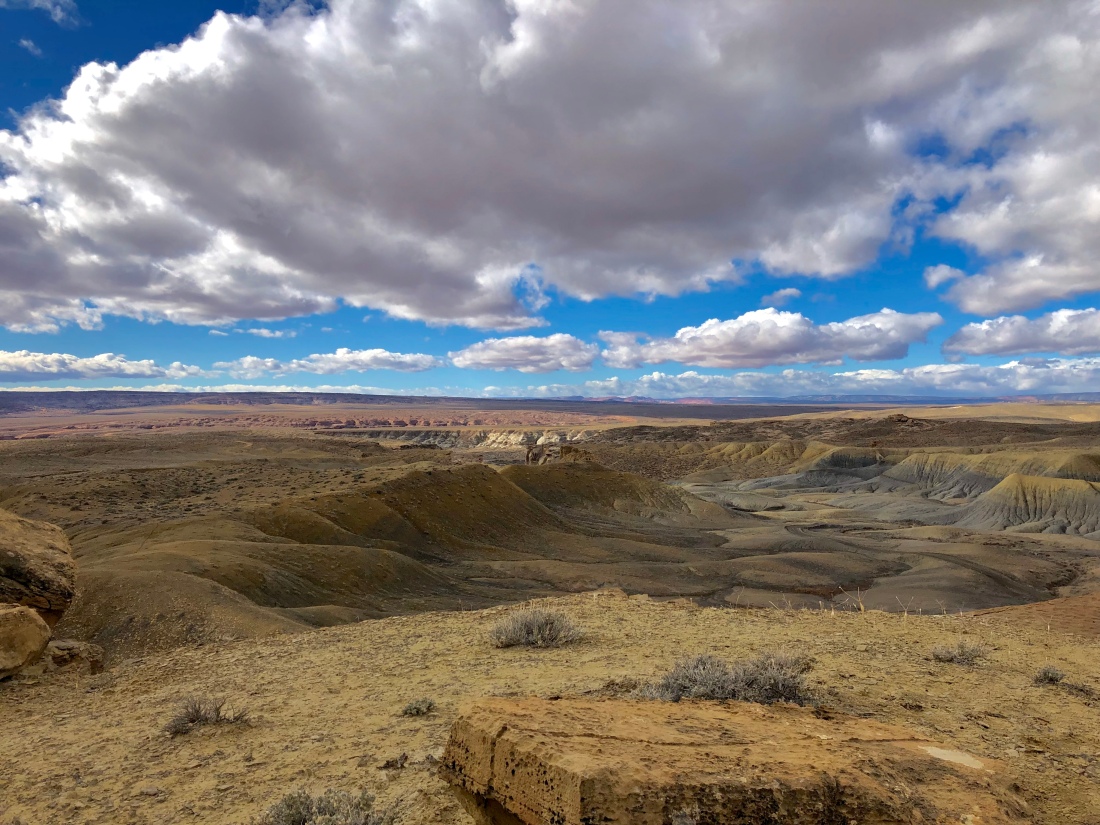
We got 15 miles in the backcountry, seeing beautiful formations and also a lot of dark, ominous clouds rolling around to the north of us. When we reached the cars, beers were cracked and everyone put their feet up to enjoy the efforts we’d just put in on hills we hadn’t expected to be so steep. The rushing water we had seen to our left when we had gotten to the trailhead was still going strong, beginning to web off into small slews to the right and left of the main force. We began talking about food..burgers…fries…and packed up our things to venture back to town for our reward.

CBFDF776-E2EE-4B95-866F-2CC22F7FE598
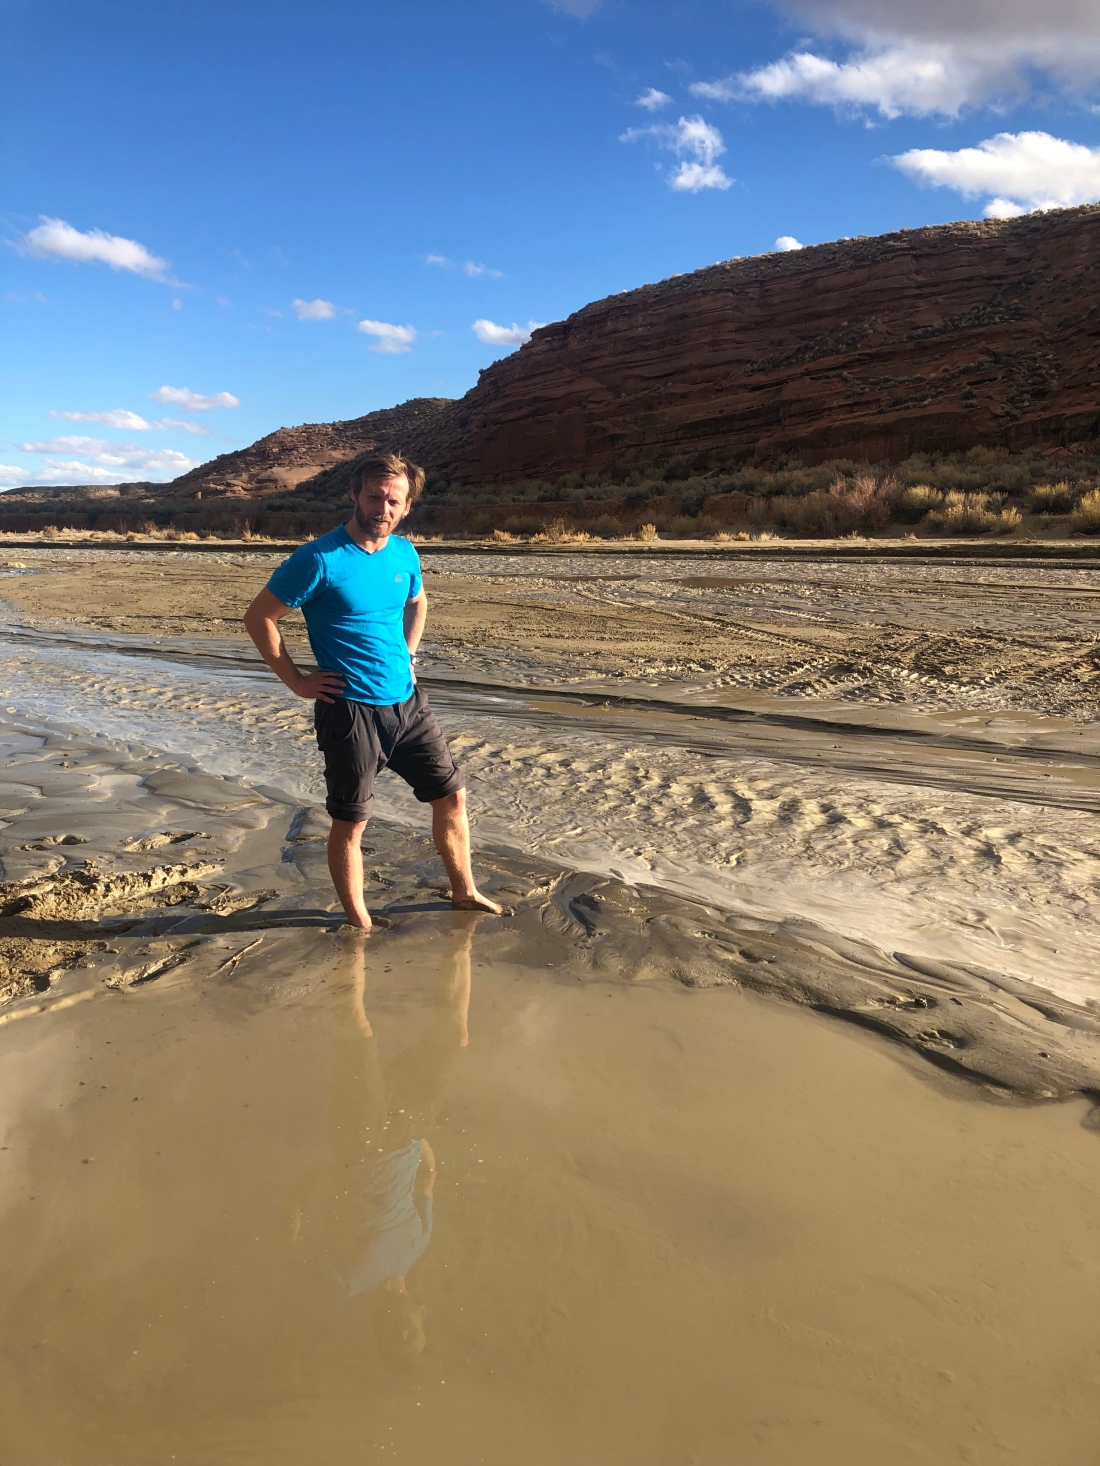
We reached the wash and…no road crossing. Where there had been nothing but dry rock and sand before, there was now rushing water with small rapids and mud so thick it was like a porridge. We all tried to make light of the situation as we began to accept we were stranded with no way across. The water was reaching chests, high thighs, with zero visibility to the bottom. Calls began to be made, what can we do? What are our options? We are stuck, can we get out ourselves? 

The firefighters wouldn’t come because it wasn’t their jurisdiction, the national forest service didn’t have the resources to assist, the deputy gave us the weather forecast and told us that we had two options: wait it out for the water to dry out or helicopter out. How did we get here?

Well, flash floods don’t mean immediate rainfall happening right in front of your eyes all the time. Rain had fallen hours north of us the day and night before our adventure, so, while the wash was empty when we began our run, those rains had been filling and flowing down the wash for miles over hours and hours to reach where we were. In an instant it had gone from empty to flowing strongly. We hadn’t known we needed to check the weather forecast for nearly 100 miles around us, we hadn’t known that no rain for our location didn’t mean no risk. Now we do….oh we learned very quickly. National Geographic even states that, “In the United States, where flood mitigation and prediction is advanced, floods do about $6 billion worth of damage and kill about 140 people every year.” 

4382C41E-0D2E-4D60-95AF-82521E1C9A47
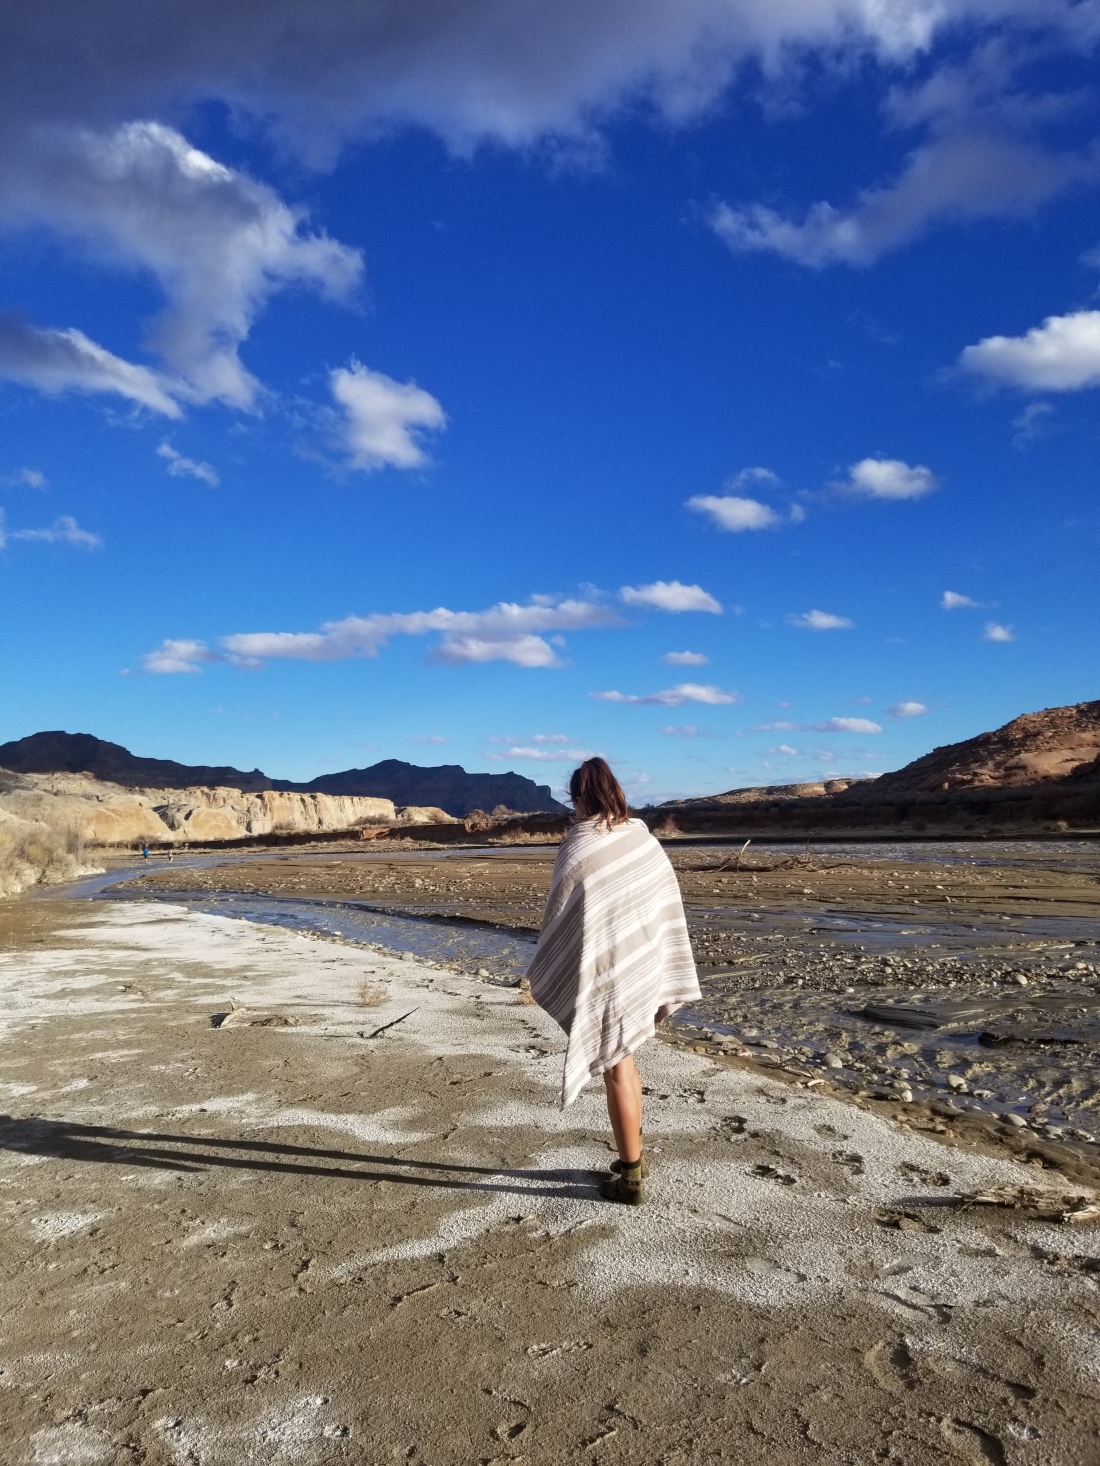
While we weren’t in danger we were still stuck. We had some water, not a ton of food but some…for now. We were more worried for more rainfall overnight or the next day to continue filling this flow. Sticks were placed into the bank to monitor water height which was steadily decreasing as the night went on. By 7, we knew we could get the 4×4 across but were really uncertain about the other two vehicles. We called a tow, driving an hour down to assist us in the night. Once he arrived he pulled the 4×4 across with ease. Next was the two-wheel drive truck, gunning the truck across the first bank which had us flying up to the ceiling as we hooped and hollered by the unexpected strength the little truck had. Everyone was slathered in mud as they got underneath the truck trying to figure out where to hook the chains before the tow began lugging us across to safety. We left the car overnight, desperately needing good sleep a shower. We tried our best to relax and recover and the next morning, returned to find…the water still shin high and flowing. The lip of the bank was broken away and the mud consumed the dry sand and rock we tried to lay down to catch tires. I couldn’t watch as our friend said she was going for it as the water was 3 inches above the body of her car. She was confident, I was bargaining with the Universe to let us successfully get out of there with all of our vehicles in tact. She powered over the first bank and gunned it across the flowing water like nothing was even there — a pro. We were so impressed, relieved and…exhausted.

What I want to say is, flash floods are not uncommon and come in many forms. From slot canyon risks to washes and roads being wiped out…Nature never waits for anyone and it was a beautiful, tough reminder that we don’t control the outdoors, the outdoors controls us. Always do research (even outside of where YOU are for what may effect you).  Some signs to look for for a potential flash flood provided by Backpacker.com are:

Check the Weather

Get the forecast for the entire watershed: Storms can trigger floods miles downstream. Recent rains? Be extra alert–saturated soil makes flooding more likely.

Scout for Signs 

Water stains on canyon walls and debris lines indicate likely flood sites. Take care in areas with rocky ground that won’t absorb excess runoff.

Watch the River

If water suddenly gets deeper, faster, muddier, or begins carrying twigs, needles, or leaves, get to high ground ASAP. Likewise, head up immediately if you hear the roar of an approaching flood.

I’ve also read that strong winds can indicate flash flooding (another thing to keep an eye on).

We were lucky we had cell service, a shovel, blankets, fire and many basics for being stuck — it is not a bad idea to always have an emergency kit in your vehicle for the just in case situations.

Soon, this can be looked back on as a party story to share and a big learning experience that humbled us all!

5 things I take on Every Trail Run


  1. Hoka One Ones1c52b4c3-5c42-46c6-aa93-1e4d33abc49d These are my current trail running shoes and I am obsessed. I have the Hoka Challengers and swear by them. They give my ankles support, I can navigate technical trails and the grip keeps me feeling stable. I’ve put roughly 350 miles on them so far and they haven’t broken down yet. For me this is a huge win since my previous pair – Altra lone peaks with the zero drop, broke down so fast my head spun around. I know this was said to be because they are vegan, but logically, when you’re logging a lot of miles per month and are wanting to be smart with your savings, you don’t want a pair that are going to break down every 2-3 months – those $140-$180 add up fast!


  1. Nathan Sports Pack49856b15-32f6-4647-b94e-dac444734a8d Getting a running pack was the best investment (besides my shoes) that I have made. I used to run with my smallish day pack and got by, but once I upped my game and got a pack designed for trail running, I was MUCH happier. Getting a trail running pack means you’re carrying less weight, your bladder fits perfectly along with additional storage space for layers, gloves, flashlight, book…whatever you think you need when you hit the trails. You have small spots for trekking poles, pockets on pockets for hydration sources and fuel (along with car keys!) Having all of these things at your fingertips right at the front of your packet on your chest is a big plus that I didn’t have with a day pack.


  1. Squirrel’s Nut Butter
    squirrel_s-nut-butter-on-rocks-vegan-from-top-836
    image credit: trailmag.co.za

    do you have thunder thighs like me? Meet your new best friend. SNB will SAVE your body from chafing. I use their vegan product on my inner thighs and the undersides of my *left arm, yes, just the left, because chafing is weird like that. Their vegan blend is candelilla wax based instead of beeswax based, but they offer that as well. This doesn’t get gross after a few miles, has a nice scent and so far, I’ve only had to apply once or twice even during marathon runs! Just remember, this stuff does get melty when it’s super hot out, so try to keep it out of the sun especially if you’re bringing it with you in your pack or it make leak!


  1. Spring Energy Gels55e18646-dd41-4fcd-ae92-e99608860ed5There are so many fueling options for the trail and I’ve honestly tried…most of them. From Gu gels to bloks and baby food packets, trail mix and protein bars – they all have their time and place. Not that long ago I started seeing Spring Energy all over people’s social media. People were raving about the quality; how natural they taste and how great the ingredient lists are…. I caved and made my first order. Well, now I get it. These gels don’t taste chemical-y, they give me great energy boosts without a crash, and I have yet to “bonk” while using them.


  1. Buff867368d9-b01c-4d37-b755-55ceb7420b8fif you haven’t gotten a buff yet let this be the sign that today is the day! Buffs are the best because they are SO versatile. I use mine when it is extremely hot to block sweat or protect my face and during cold weather to block wind chill and cover my ears and nose when it gets chilly. I pretty much always have one on me and don’t know what I did before I invested in one of these guys.


Honorable mentions: headlamp because you never know where adventures will take you and you should always be prepared! Hydration tablets because electrolytes will be your bestie, especially here in the desert. Some kind of GPS tracking (strava’s Beacon feature, watches like Garmin and Suunto, AllTrails Pro, RouteScout, etc) because getting lost once you’ve been hauling your body around is not ideal!

So You Want To Start Trail Running…A Bit of Advice From A Beginner

7f8f27d8-f88b-42e0-878f-f26553937ca4

Before I started running trails it was one major thing: intimidating. All the balancing on rocks, climbing up hills and potentially falling on my face really scared me. But really, deep down, I was scared to fail. I was scared to skin my knees and cry and suck at it (as a side note I have skinned my knees, cried and said…”I suck at this” multiple times).

Growing up, after being a competitive gymnast for ten years, I tried running track for a year. I ran the 400-meter sprint and the 4×4 relay and…detested it. I loathed it. My hips hurt, I couldn’t breathe. I wasn’t cut out for it. I told myself. In college I got really into running on the treadmill. I’d go log 6 miles like clockwork nearly every day, but it was boring, coming from an unhealthy place  and unsustainable for me. Road running was never in the books because gymnastics made my knees ache with the impact and honestly, running near passing vehicles didn’t appeal to me. When I started training for bodybuilding shows in 2014, I had to do interval sprints. These I liked. Pumping my legs powerfully, messing with the elevation on the treadmill. 1-minute sprint, 1-minute slow jog, 1-minute sprint…I didn’t know I was priming myself for FARTLEKS. I got to a point where I could control my breathing, and this felt…powerful.

At the end of 2017 I met Scott, who loves the outdoors just as much as I do. We bonded over nature, getting on the trails and self-propelled experiences. My mode: hiking, his mode: running. As you can see, he persuaded and I will forever say, forced me into running when I would have much rather hiked. But there I was in REI, buying a pair of Altra trail running shoes at the end of December, downloading the Strava app to my phone saying, “here goes nothing”.


Well, let me tell you, from December to March I struggled. I was discouraged. I hated trail running but kept. Showing. Up. What I’ve learned in the months I’ve really taken trail running seriously, and fallen in love with the sport is as follows (and I hope it helps you feel confident to get out here too!)

b54081ea-74c9-459f-863b-819a92cff841

1:  Do not go out on the trails expecting to run as quickly as you do on a treadmill, track or road. If you are able to run an 8- or 9-minute mile on these surfaces, expect to run much slower on trails. When I started, I was sprinting for half a mile, my chest bursting, huffing for air and then, forced to stop and rest, discouraged at my inability to run miles this way. Around March, when Scott really started running with me and teaching me how to pace, I learned what my problem was: I needed to slow down. A lot. Scott taught me to slow down to a pace where I could carry a conversation, I was breathing easily, and it felt almost…boring. This was what he calls an “all day pace”. My all-day pace was around 12:30-12:45 minutes per mile. Imagine going from an 8-minute sprint up the trails to 12:30, it is a huge difference. A necessary difference. I use my Apple Watch on “Outdoor Run” setting to keep myself in line pace-wise, I can look down and check any time to make sure I’m at a good pace and how my heart rate is.

2: Pick flat trails with very little technicality. When you first start running try to find smooth trails that don’t contain tons of rock or technical work that you aren’t prepared for. The Phoenix Mountain Preserve, Dreamy Draw, Browns Ranch and McDowell Mountain Regional Park all contain options that have flat, nicely maintained trails to learn on (these are near me and easy to reference but AllTrails is a great place to scope out easy trails with very little elevation in your area). Taking out the technicality means you can focus on your breathing, your feet, your stride and just being out there. How do you feel? Are you enjoying this? How quick are your footsteps? How is your heart rate?

839c7674-5ad0-4a65-8cc7-8d9528e61a31

3: Don’t try to run the uphills just yet. Your new to this and your body needs time to build up stamina and endurance. If you need to hike, allow yourself to do that! Don’t try to take the uphills at a run – typically, you can hike uphill faster than many can run anyways. The uphills then give you a chance to catch your breath and re-energize for the efforts you need to make coming up! I am not a strong uphill runner, but I am a strong uphill hiker since that was my background and I use that to my advantage. I run with friends that always run the uphills and some that are like me, it is personal preference like anything else – but starting out, save that energy and just hike it!

0B840979-5831-44B9-9621-7EB8178B561F.jpeg

4: Bring enough water and snacks, you need it! What you will quickly find out is that trail running is WORK. It uses your whole body and therefore, you burn a lot of calories doing it! Probably more than you think you would and staying energized and properly fueled and hydrated is really important when you’re out there. When I started, I would suck down my 60oz. of water in 3-4 miles, where now I can maintain at a slower pace with that same amount for closer to 10 miles. I bring lots of snacks: Spring Energy gels, Clif Bloks, Pro Bar Bites, dates, nuts, chia seed packets, baby food vegetable packs, electrolyte tabs for my water, SaltStick chews, almond butter packets. You will learn what your stomach likes and dislikes when you’re on trail (you’ll either feel great or get cramps and feel like you need to use the bathroom….you’ll know). These are things that work for me as I struggle to eat and run at the same time and can’t process things like burritos or pizza or pb&js when I’m running. This is totally trial and error, but it is important!

5e9cc1e0-93f9-466c-bb7d-a00b05a2010c

  1. Don’t compare your efforts to other peoples. This is hard and something I’m still working on. I follow and surround myself with other people who also trail run and perform a LOT faster and better than me. Sometimes that can be discouraging for me when really, it should be inspiring and something for me to strive towards! Everyone is a beginner at first and these people all started somewhere. What I’ve noticed is many amazing runners were long distance athletes growing up, this has been with them for YEARS. So just remember that, when you get out there, you are doing the best for YOU. You are out there for YOU. You are doing something that not many others can say they can/are willing to do. Give yourself the biggest pat on the back because you’re pushing your own limits and getting stronger mentally and physically by being out there on the trails.

DE96CF56-31EA-4E42-B890-D0993EA27B35.jpeg

Some other things I want to note is that running with others is way more fun and there are tons of running groups in the Phoenix area to link up with! Getting out there may feel intimidating but having others around to encourage and hold you accountable can be key. I am grateful to have a built in system with my boyfriend and our circle of friends that all run and the Aravaipa running group I am in (they hold group runs every Wednesday night that you can find in their Facebook group and on Meetup.com)!

Most importantly: get out there and have fun, challenge yourself and watch yourself grow! Don’t be afraid to fall, skin your knees or cry — running brings out so many emotions and it is amazing what you will learn about yourself along the way.

Top Trails in Regional Parks Near Phoenix You Don’t Want to Overlook!

  1. Lake Pleasant Regional Park
lakepleasant
image credit: azcentral.com

Lake Pleasant is just that….so pleasant! With camping sites branching off the main road like a web before you hit the marina, you have plenty of options to set up camp and enjoy the starlight and calming sounds of the water from your tent. Even better? The trails that surround and overlook the lake itself. For a short hike (3.1 miles) with amazing views and under 500 feet of elevation gain, Yavapai Point is one that can’t be beat! It climbs to a lookout point where you can see lake, boats and all the rolling mountains in the back. You can even connect trails to add on if you’re feeling good and have more time.

2. Skyline Regional Park

skyline
image credit: azcentral.com

If you’re anything like me, a loop trail is the preferred kind of trail to explore. You always see something new and that makes being outside even more enjoyable. Skyline Regional Park offers beautiful 360 views of rolling mountains and traditional desert-scape. The trail here you should give a go is Skyline and Quartz Mine Loop!  With just under 1k in elevation gain in 4.5 miles, this hike is still leisurely although exposed, so make sure to bring plenty of water, a hat and sunscreen.

3.  Spur Cross Ranch Conservation Area

elephant
image credit: azutopia.com

I am a big fan of this conservation area. It is more remote, quaint and the views of the mountains here are stunning. You need to pay cash, so please remember to bring it with when you go explore! For a more challenging hike I highly recommend Elephant Mountain Trail — a 7 mile loop with roughly 1300 feet of elevation gain. When you reach the top of Elephant mountain you can see for miles, the wind a welcomed visitor after the climb. This trail is exposed and you will need water and fuel for the effort!

4.    White Tanks Regional Park

whitetanks
image credit: tripstodiscover.com

This regional park is rugged, exposed and oh so beautiful. The White Tanks hold seasonal waterfalls and plenty of trails to choose from whether you want something easy or something that will really push you. A quick, beautiful trail to explore for a seasonal fall is aptly named: The Waterfall Trail. Not only may you find flowing water but also many petroglyphs with very minimal elevation gain. I consider that a win! Want to really challenge yourself? I recommend the 16.4 mile haul on the Goat Camp Trail. This trail rises nearly 3116 feet in elevation and some steep climbs — my favorite kind of trail! If you enjoy light scrambling and climbs, this is the long route for you.

5.  Usery Mountain Regional Park

usery.jpg
image credit: eastvalleytribune.com

Usery, within the Goldfield mountains is a beautiful, jagged, raw-looking area which makes it very unique to what we see surrounding Phoenix. If you haven’t been out to this area yet, what are you waiting for?! For a lightly trafficked, gorgeous adventure, Meridian Trail offers jaw-dropping views and only 260 feet of elevation gain in 5.3 miles. This trail would be great for beginner hikes or trail runners while more advanced hikers/runners may want to tack on some other trails to this one.

Why I Don’t Geotag

lnt

There used to be a time that I would tag trails all the time, which I will admittedly say was from complete ignorance. With the large sharing of places and spaces via social media, it is beyond important to realize what impact we have on the places we go. There are Leave No Trace guidelines that most people are aware of: don’t litter, pack in pack out, hiking/running on trails and protecting living soil, don’t take or mess with artifacts or anything you find from the past — preservation. It is preservation in every way we can possibly preserve while still enjoying the outdoors to its fullest extent. You can read more on these principles here: https://lnt.org/learn/7-principles 

Beyond the guidelines we are more aware of there is now one for social media specifically. Be mindful of what your images portray and what you tag. What have I been taking to heart? How many people do I reach or influence? While I may not have a HUGE following, I know I share things and reach several hundred people via stories and over a thousand when I post.

Now imagine if every single person I reached decided they also wanted to go to the exact same trail and experience it. Is there such a thing as loving a place too much? I honestly think there can be, we’ve seen what happened with Horseshoe Bend and the swarms of people now going which has lead to fences going up and potential permitting. Can the trail I share handle an influx of people going and experiencing it? How well known is this trail/area? Are there natural spaces that could get damaged? I try to keep in mind ruins, arches, caves, sacred grounds from Native tribes, etc. An influx of people visiting these spaces can run down the space and recently we have seen the aftermath of people who don’t respect or appreciate nature the same as you might impacting a place you love: http://www.fox10phoenix.com/news/arizona-news/robbers-roost-in-sedona-defaced-with-graffiti

This legitimately enrages me. But we can do our part to protect and speak up for the spaces and areas we love: be mindful. This is why I don’t share specific trails unless it is potentially inside a National/State park or monument. Instead, I share a region or general area. Half of the fun in my opinion is researching areas and finding trails and amazing features for yourself. When you do the work of researching, you feel rewarded! I utilize many online resources: the AllTrails app (downloadable via the apple store) which allows you to look up trails based on area, length, elevation, rating, etc. I utilize blogs and websites like hikearizona.com, I look at maps, I look at google earth even though I’m not very good at it. I will sit online and type in features I want to see “in ____ area” and see what comes up. I don’t stop on the first or second or third page of the internet. I search. I dig. If I want to see and experience something, I will put in my due diligence. To this date I’ve only asked for information on one trail and I respectfully asked someone and expressed I wouldn’t be upset if they chose not to share information. It is up to us if we want to give out information, it is not snobby or rude…it is being mindful.

The new social media guidelines for NLT can be found here: https://lnt.org/blog/new-social-media-guidance

also here: https://www.outsideonline.com/2276176/21st-century-update-leave-no-trace-principles

Everyone is talking about this. Everyone is trying to shift to protect spaces they can wind up being loved to death. We want to be able to keep things wild, we want to go on trails and not see other people’s trash and graffiti. We want to have these places to share with our children and their children, right? Right.

I know the ultimate means of LNT is to not post about a place at all, not share at all but for me, sharing beautiful moments is something I enjoy. I enjoy sharing photos because I use Instagram as a personal visual diary, but I know that in and of itself still may play a part. So I attempt to minimize my footprint in this way. I am not ever trying to be rude or snobby or better than by not responding to a “where is this?!” comment, I am simply choosing to be mindful.

If you do a little digging, I promise you will find AMAZING places and trails and feel beyond fulfilled and excited when you track things down on your own.

There’s also nothing wrong with sharing information — but again, consider the impact of sharing information and with whom you share it with. Are they respectful of LNT principles? Do they abide by these guidelines? What is their influence and impact? 

Munds > Hangover > Cowpies

On the westside of Sedona you’ll find Munds Mountain Wilderness looming overhead with Pink Jeep Tours navigating the dirt roads, telling fun facts and jokes along the way. You’ll also find slightly less trafficked trails with beautiful views overlooking many different red rock structures in the surrounding areas.

One of my newer-found favorites is Hangover trail. I do it as a loop and get all of my favorite things: shaded, beautiful trees, elevation, and amazing rock structures with views for days! You’ll park at the red rock station off of Schnebly Hill Road that also leads to Huckaby trailhead. It’s $5 to park there and has a little bathroom as well as a few picnic tables. At nearly 9 miles long and about 1100 feet of elevation gain, this loop is ideal for a solid day of hiking in the area but once you turn to take Hangover trail, you don’t have nearly as much shade so please come prepared with water, electrolytes, a hat and sunscreen!

Take the Munds Wagon trail to get started and head down and around a little sinkhole of sorts. This beginning area navigates you around the jeep road as you take a turn and rise up to the road – walking across and onto another trail before crossing it again and soon, descending downwards with a beautiful view of Sedona red rock sprawling out in front of you. I’ve taken this initial start-off trail in the winter and in warmer weather and never stop loving the sights you get to take in. Truly, Sedona is one of my favorites. From the red rock to the unique formations and mix of dense trees, cacti and shrubbery — I never get bored.

You have about 1.7 miles enjoying Munds Wagon trail with shade, a dry creek (which may have nice flow once there is rain) and slight elevation gain before you turn left and connect to Hangover Trail. Hangover gives you all of your elevation gain, switchbacks winding up and around as the Mitten Ridge views breakaway the higher you climb. Truly, these vistas are stunning and it’s one of my top 4 favorite views in the area. You’ll find cactus blossoms in the Spring in multi-color along the way and, if you’re lucky, you may catch sight of a deer, coyote or fox! Mountain bikers and trail runners also love this trail so keep an eye out — I’d say there are more mountain bikers than hikers on this route!

You’ll overlook trails to the South with the dusty red rock and hunter green melding together below you as you hike across layers of red rocks. You’ll climb up between two towering sections of rock and over onto a jaw-dropping saddle that gives you views of Mt. Wilson, Oak Creek Canyon and further beyond to the west. The saddle has layers that you follow white markers to climb up, toeing edges and soon, facing Oak Creek Canyon fully. Seeing the lush green close to the water in contrast to the forest green and red is lovely. You’ll see lots of unique rock, spires and overlooks as you follow the trail. This trail is very well kept and easy to follow – so no worries here!

You’ll see a cairn that has you climb up and over a large ledge on the lefthand side that invites you back to a view of Munds Mountain Wilderness, the Merry-Go-Round rock and Cowpies. All of the diverse structures are amazing to take in in one panoramic view.

Follow the trail on down as you pick your way towards the Cowpies area with the canyon cutting open in front and below you. Take a moment to stop and hang out with your feet dangling off the edge, looking out into the distance – I promise you won’t be disappointed. All of this is exposed hiking, which is when you’ll probably start feeling the heat (especially if you’re doing this in Spring/Summer!)

Head back down the Cowpies connect for a little dense tree area that will loop you back around to Munds, which you’ll follow right back to your car. The lot is usually bustling by the afternoon but this trail isn’t heavily trafficked with others on foot, which I really enjoy.

If you’re looking for an escape in the Sedona rocks, I highly recommend giving this route a shot. I absolutely love this trail, PLEASE if you use it, take great care of it, pick up trash if you see it and leave this one (any one) better than you found it!

Exploring the Dells

Prescott, Arizona is about an hour and a half from Scottsdale. A nice, easy drive Northwest will lead you to this bustling little area with some of the neatest rock formations I’ve seen.

34368438_10155864700419775_162429650180505600_n.jpg

I started my day trip with a stop at the Constellation Trail System. The trail is free and is a total of 2.74 miles with plenty of off shoots to choose between! Going through the Dells is a really unique experience with very well marked pathways. The granite juts out of the ground, is growing inside other rocks and all-in-all makes it a really pretty trail (if you like rocks and things!)

There’s a nice monument with several benches at the beginning along with a shaded grouping of trees for when the exposure gets a little too toasty. Once you head out on the trails, there are plenty of rocks to scramble up, between and over. I thoroughly enjoyed all the water markings, rock coloring, formations and looking out into the distance where it looks like an ocean of flowing rocks.

I meandered around taking photos and enjoying the formations for about an hour before heading towards Watson Lake. Since I had never visited Prescott before, I tried to not set expectations of experiencing something “really cool”. I pulled up to one of the parking lots above the lake, looking out at paddle boarders and kayaks leisurely venturing across the lake. It was serene and beautiful with the multicolored rocks jutting out and cropping up to the left. I noticed a frisbee golf course in the same direction and thought it was a gorgeous backdrop for a day of fun.

With another free trail on my hands I headed down the ravine to what is listed as the Watson Lake Circle Loop, meets Flume trail, meets Mile High Trail. I started walking on the graveled path nearing a big canopy of shaded marsh area with pretty budding flowers, vines, cattails and trees. There was a social trail that branched off that included plaques that shared information about the different flora along the way that I really enjoyed reading about. It looped me up and above to another wide, dirt trail headed back towards the lake, passing a police shooting range on my right. Once I got to the lake, Granite Dells and fun shaped rock formations appeared. I began to climb and veer off the trail, exploring in between these rock groupings and towards the water. The ground was super soft, although it looked hard and cracked. I watched herons and ducks wading and bobbing in the water before following the trail marked the “Mile High Route” and advised as “more tactical and harder” than the previous one I’d been on –perfect.

I followed the white markings along the rocks and wove up and down, between and below all different kinds of rock mounds. The views as you scramble around are lovely and the rocks themselves make for a diverse viewing. At one point you begin to descend and reach an area that is lush with high green fronds. It immediately reminded me of Havasupai and soon, I heard that same bellowing roar, knowing very well I was about to see a waterfall. I walked up the trail between the high grass and saw the creek dump from a large stagnant pool. Above it shoots out a large, prominent waterfall that is coming from the lake dam. It has smaller waterfalls trickling from its sides and, although it’s in a dam reservoir, it is really pretty to see! There are metal ladders and a chain to use if you want to shimmy over for a closer look (but there is a bit of a potent smell!)

Once you’re done oogling over the waterfall, you cross a small grated ladder over the creek and begin your ascent out of the small canyon area. You reach a higher point where the trail taunts you with a “steep or steeper” sign, pointing in two directions. I chose to use the steeper section and felt a little out of breath once I reached the top! It is definitely a fun, good workout doing this loop around the lake and is just enough to get the blood pumping. I climbed up and over, down and around the lake, admiring the rocks with their blue and purple rings along the bottom. Soon, I saw the kayak rental area appear in the distance and my car above it. The total hike was about 7.5 miles for me after adding in the nature trail at the beginning. I spent a lot of time meandering through the rocks, climbing off trail and enjoying the area and the views it had to offer. You could spend so much time here but remember, it is almost all exposed with no shading and a lot of rock, so it gets toasty — bring plenty of water, a hat and sunscreen!

The Floor is Lava!

When you think of the desert, you may not correlate that with volcanoes, lava rock, craters and pine trees. But that is exactly what you find when you visit Sunset Crater National Monument in Flagstaff, Arizona.

When you turn onto the forest road you are surrounded by some of the 3,040 acres the monument claims in Coconino National Forest. Open from 9am to 5pm you can pay $20 per (passenger) vehicle to enjoy the 34 mile scenic loop that winds back from Highway 89 through Sunset Crater Volcano and leads you to Wupatki National Monuments. While you enjoy the drive, you will go from high Ponderosa Pine forests of Sunset Crater, down nearly 2,000 feet in elevation to the red rocks and painted desert vistas of Wupatki. Experiencing the climate change between these two areas in such a short amount of time is a thrill in and of itself! Roll your windows down and enjoy the breeze while you pass mounds of volcanic rock, Ponderosas and see mountain after mountain rolling in the distance. 


If you want to explore this area more in-depth there are five hiking trails in the monument! Ranging from .2 scenic overlooks to 3 mile routes, there is something for everyone.  


Sunset Crater is actually the youngest volcano in the San Francisco volcanic field. The Sunset Crater cone is 1,120 feet high after its eruption around A.D. 1085 (which is debated). The eruption itself created the Bonita and Kana-a lava flows that reached 1.6 miles and 6 miles, respectively. When you visit this monument, you’ll see that the volcano has somewhat revegetated with pine trees and beautiful wildflowers.

Driving further back beyond the crater and hiking trails, you will wind down onto flat plain lands with higher climate temps. You’ll curve back and forth watching the pine trees disperse into scattered wildflowers and cacti with the painted desert as your backdrop in the distance. Soon, you’ll see a turn off for Wukoki and Wupatki pueblos.


There are many settlement sites within the monument that were built by Ancient Pueblan People like the the Cohonina, Kayenta, Anasazi, and Singua. Wupatki, which means “The Tall House” was inhabited around 500 A.D. and has several stories and over 100 rooms, a community room, a ball court and a natural blowhole (from the lava tubes!). This stature makes it the largest building in nearly 50 miles and truly, when you’re taking it in from up close it is truly grand.

There was a population boom after Sunset Crater erupted thanks in major part to the volcanic ash that blanketed the ground, making agricultural endeavors more fruitful and productive with the soils newfound ability to retain moisture.


For me, walking around these expansive ruin sites was breathtaking. Looking up at the height and detail of these structures still amazes me. Native American craftsmanship was genius. From natural ventilation made from perfectly placed holes in their structures to mortar and beam placement that withstood nature for thousands of years, you can truly feel the history in these places. I sat looking at these pueblos for long periods of time, imaging their lives in these large estates with Humphrey’s Peak still snow capped in the distance. It is a beautiful sight.

These monuments are well worth your time while passing through, not only for the trails and beauty but for the history!